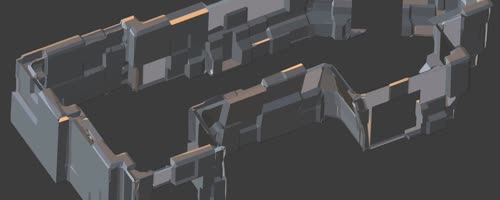
final corridor
Substantial progress!
A fitting modifier stack
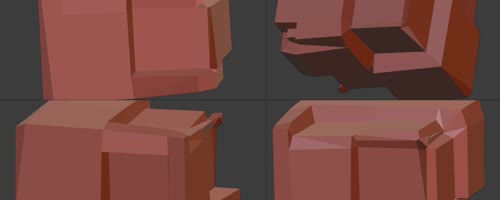
Based on the last attempt I reworked the modifier stack slightly, and walls with irregular heights and depths are the result, the occasional chaotic spot included. For the floor and ceiling I changed some parameters, so they are noticeably more flat overall.
Working on the more complex wall model, some problems occured after using the boolean modifier several times to cut holes. Blender crashed whenever I entered edit mode. Now blenders recovery options are very good, so it was no drama, but still annoying. Even applying all modifiers didn't help. I was able to cut more holes via bools into the walls, but it left gaps and I had to add filler objects to cover them.
Next time I will do the wall from several parts. in case this will result in bad blending (which I consider likely), I'll just shift the wall parts into each other slightly and cover bad spots with other objects. My overall messy graphic style will prove forgiving here. Also I am confident I can avoid crashes this way.
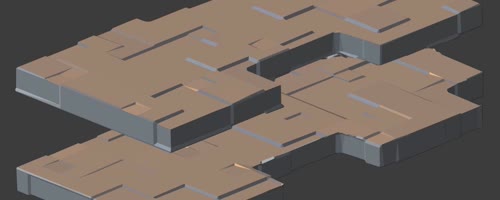
Floor and ceiling
As mentioned, these are made from the same modifierstack but with different parameters. The texture-based displacement is down-tuned a lot.
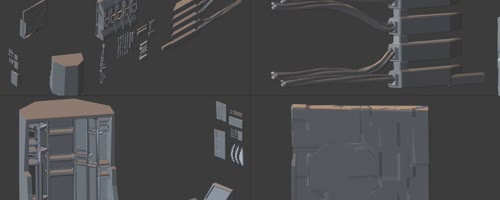
Other objects
To avoid repetition, a lot of devices are placed against the walls. They have to fit well to the walls, style-wise, so this means: not too many details, an overall messy style (done with help of displacement modifier), no parallel edges, no 90°-corners and no use of bevel-modifier.
Different styles
Since there are only humans in my fictive universe, all ships have a similar construction style.
Still there needs to be a difference between a shabby pirate ship with lots of makeshift-constructions and -repairs, and an expensive corvette which is part of a government fleet, in which you can eat from the floor.
I will probably tune the modifiers of the walls down, so they appear more regular, and will use a more coherent style for the devices, to make the difference easily visible.
Final result / next steps
Who got until here may look at two images from the inside of the complete corridor:
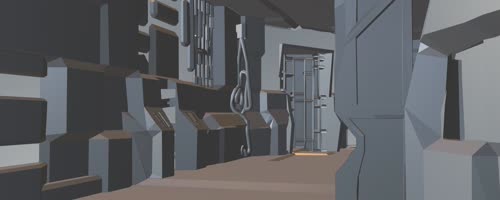
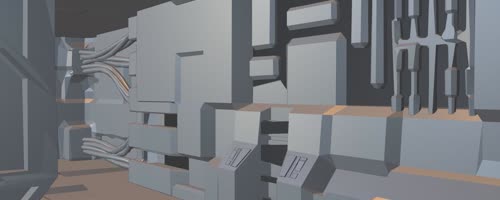
Next step is texturizing/colorizing. Which style it will be in the end, I can't tell yet. Inbetween-results will tell. I'll write about the failed attempts shorter this time, probably in a single post.


Want to comment? Mail to 006@riidom.eu !
I may abridge or edit your comment or not publish it at all. Rules of common sense apply. Add a username or be a "guest". If you want your message to stay private, don't forget to let me know. This is a manual process, so be patient :)