Fri, 03 Nov 2023 15:00:00 +0100
2023-Nov-03
DFH: finals
The "small" project is done. Also, some details.
Fresh animation, fresh camera perspective, and done
This took much longer than expected!
This took much longer than expected!
more...
I estimated a tight week, actually it took a bit more than a month.
Based on the animation trouble from the last post, I redid the whole animation, each step individually this time, incl. the stumble. Also I wanted a more dramatic perspective, less clinic like this side/above. Aside the character there are some other things, but later more; first of all the final animation:
Based on the animation trouble from the last post, I redid the whole animation, each step individually this time, incl. the stumble. Also I wanted a more dramatic perspective, less clinic like this side/above. Aside the character there are some other things, but later more; first of all the final animation:
more...
My animation strategy was not fitting, more in DFH: New in 3D.
The resolution is a bit higher this time, 1440x810px, and I compressed a bit more gentle in Handbrake. The file size is around a megabyte, which I am happy with.
The resolution is a bit higher this time, 1440x810px, and I compressed a bit more gentle in Handbrake. The file size is around a megabyte, which I am happy with.
more...
Handbrake is a tool based on ffmpeg to convert and compress (and more) videos , open source and very recommended!
What I didn't like in the end, are the mushrooms and the meat vines, mostly. For the mushrooms I built a semi-automatic system, which I was maybe a bit too proud of in the end. Some manual work would have helped the mushrooms a lot. And the meat vines I rushed into the scene at the very end. Sleeping over these for a night would have been nice, but I just wanted to get the video done.
Apart from that, I am quite happy with the animation. There is some minor clipping here and there, and the back is a tad too stiff in the end, but that are just smaller issues.
So much for my own opinion, hope it's okay:) Even though there is zero meaning or plot, just someone stumbling across the screen. For my next animation I would like to have at least traces of a plot.
So much for my own opinion, hope it's okay:) Even though there is zero meaning or plot, just someone stumbling across the screen. For my next animation I would like to have at least traces of a plot.
more...
I plan to kinda check the internet. On Mastodon I have some SF micro stories in my timeline and some ttrpg toots. Or I use my good old strategy and let myself be inspired by images.
The second half of the post will be more technical and blender specific.
The second half of the post will be more technical and blender specific.
more...
But still interesting!
Some details close up
Intestine tentacles
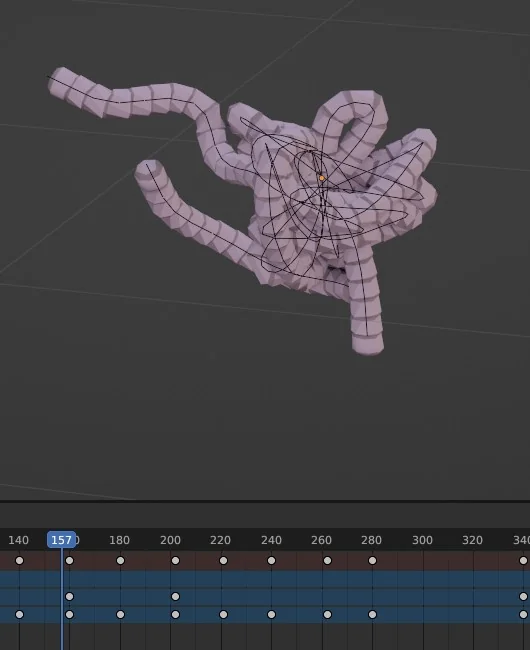
The intestines consist of three parts, the center blob and two tentacles to the left.
The intestines consist of three parts, the center blob and two tentacles to the left.
more...
The difference is hard to spot, but that is kinda the purpose. The lines inside are also hard to differentiate. This is because curves and rigs in wire display mode look identical.
The blob consists of a curve, I started with a SpiroFit (a helix sort of), then used several times select random, selected half of the points and scaled or rotated these.
Then I created a shapekey (technically two, Basis key and then Key 1). On Key 1 I changed the tilt of the curve, which causes these snake-like rolling (and as I discovered, fortunately gets recorced by the shape key), moved some curve control points so there is some actual movement as well.
Finally I animated the shapekey's influence over the whole animation length from 0 to 1. This worked out in this case, because the resulting animation speed, depending on the animation total length (420 frames), turned out to be fine. Would the animation be a lot longer, I would have to chain a few shape keys, if shorter, I would have animated the influence from 0 to something smaller than 1 instead.
The separated tentacles are controlled by a rig. I used bendy bones. And as I discovered, if you put these into display mode wire, the bending actually shows up. These are animated normally, with a few keyframes. A bit more efford, but a lot more control and I am able to let one of them hunger for the character.
The section of the dope sheet shows that the animation isn't too complex.The top, brown row is the summary, the empty row below is the center blob (just one keyframe each on frame 0 and 420), the two on bottom are the tentacles. This is the part where the tentacle focuses on the character, the most action-packed moment of the tentacle animation.
Bone mushrooms
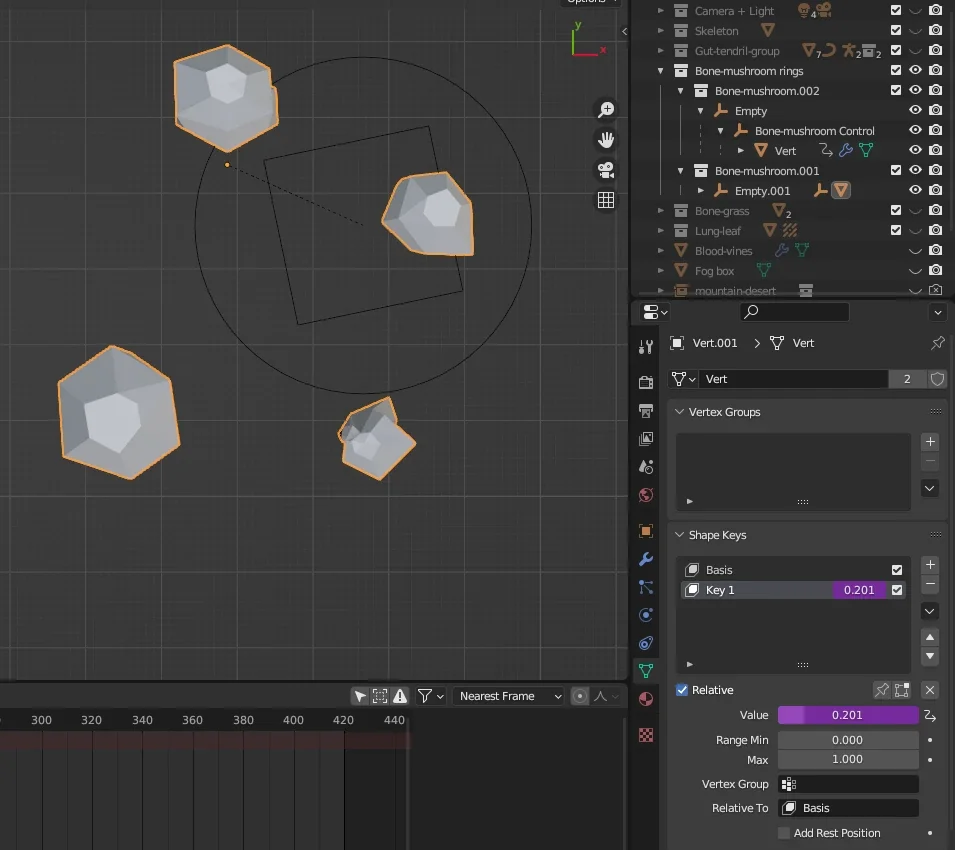
The setup is a bit involved, but it was fun to develop. The mushrooms are done with an Array Modifier, circular around the quadratic empty (Object Offset).
Offsetting the origin of the mushrooms relative to the empty causes the mushrooms to form a distorted ring.
Offsetting the origin of the mushrooms relative to the empty causes the mushrooms to form a distorted ring.
more...
Can be seen on the screenshot: The orange dot (center of mesh object), connected with a dotted line to the center of the quadratic empty.
Rotating the quadratic empty affects the amount of mushrooms in the ring. This is done via driver. Formula: (pi * 2) / abs(var) Trap warning: Blender takes degrees about everywhere, but in side the driver it's radians (two times Pi equals 360°). var stores the current Rotation Z. Admittedly the formula is halfway trial and error, and has some pretty bad edge cases. But not overdoing it helps to avoid these, which is good enough for this use case.
Rotating the quadratic empty affects the amount of mushrooms in the ring. This is done via driver. Formula: (pi * 2) / abs(var) Trap warning: Blender takes degrees about everywhere, but in side the driver it's radians (two times Pi equals 360°). var stores the current Rotation Z. Admittedly the formula is halfway trial and error, and has some pretty bad edge cases. But not overdoing it helps to avoid these, which is good enough for this use case.
more...
The bigger circular empty exists for the case where you want to rotate the whole ring without anything else happening beside the rotation.
As can be seen on the screenshot, the shape key also gets controlled by a driver (indicated by the violet background color of the influence input). This shape key moves the nushrooms further outwards. Zhe more mushrooms there are, the bigger the ring needs to be so they dont stand too close to each other. Instead of adding a small rig or alike, I just pushed all vertices via shape key further away from the object origin. The driver formular is also based on Rotation Z of the quadratic empty: .25 / abs(var). Again, mostly trial and error :) Edge-case behaviour is also mediocre, but careful touching of knobs and wheels mitigates the problem.
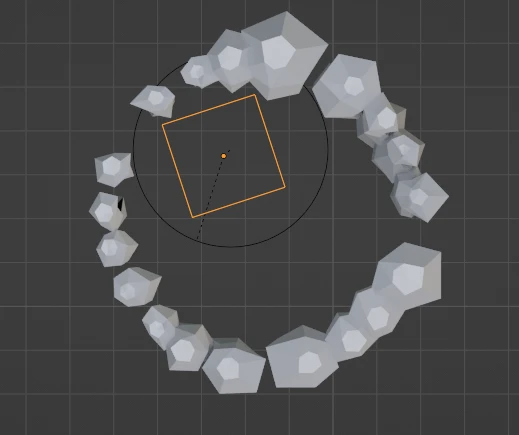
More mushrooms. As can be seen, the ring is bigger now.
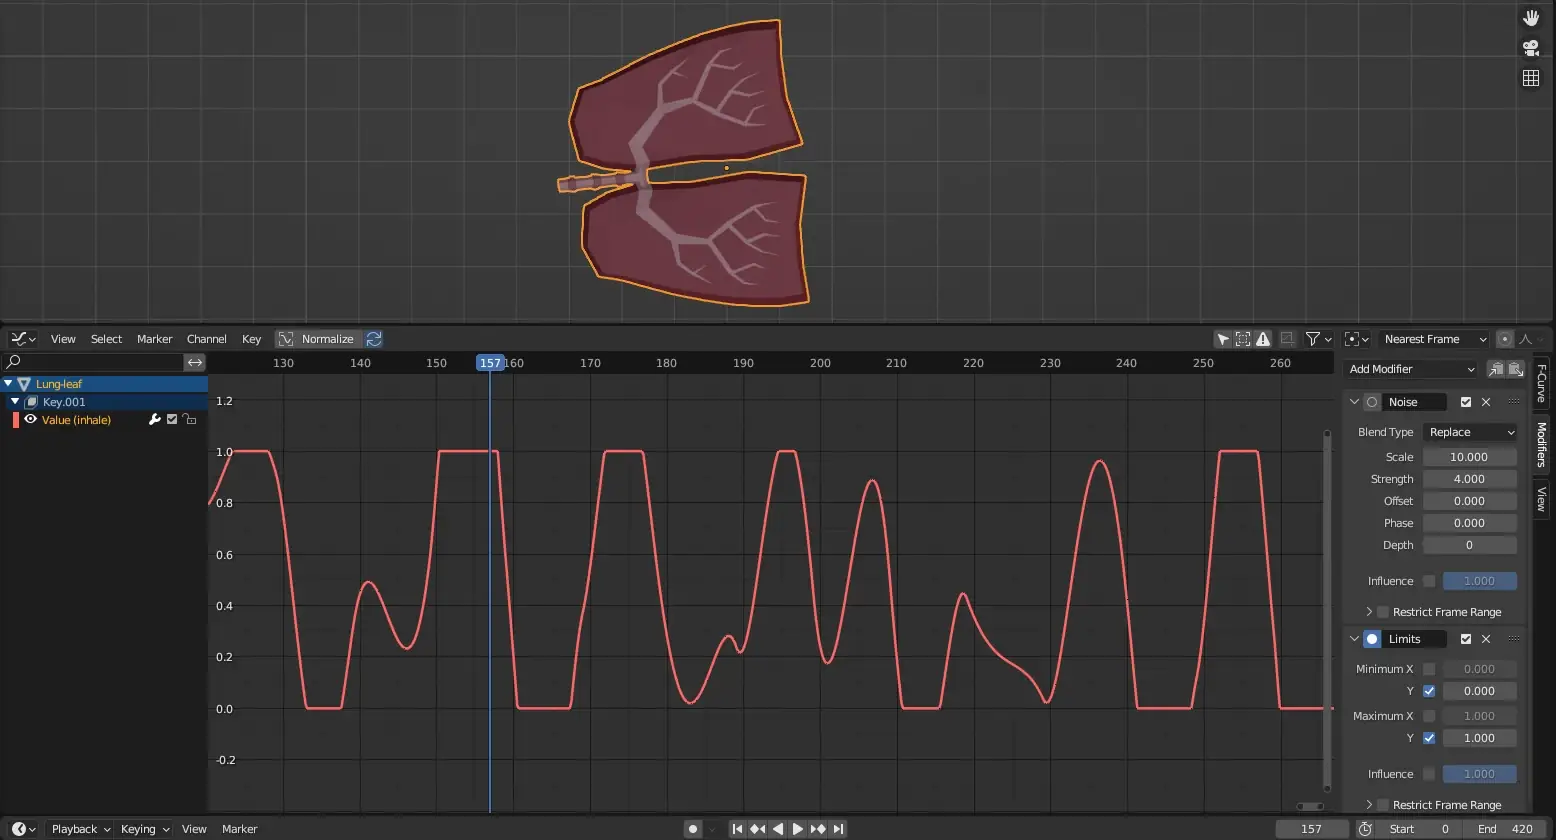
Lung plant
The lungs are also animated via shape key. Interesting is that there is just a single keyframe with value 0.5 on frame zero, and the movement is done in the graph editor with a noise modifier.
The modifier exceeds the influence boundaries of 0 and 1, so I can have an additional limits modifer to have these cut off plateaus on top (1) and bottom (0), which gives some more breathing vibes. Hectic, irregular breathing vibes.